Placement of Pit and Fissure Sealants
The sealant lab, on video
The Board’s course outline includes a lab on two extracted teeth. In this course you do it at your own office, in one unedited video, and Dr. Smith watches it and approves it before you seal a patient’s tooth.
How it works
Five steps, all at your own office
You do the lab after you pass the final exam, with the same equipment you’d use on a patient.
Get two teeth
Two extracted molars or premolars with clear pits and fissures, no decay and no amalgam. Most offices can save them. If yours can’t, the school can arrange a two-tooth kit for pickup at the Hillsboro campus.
Clean, sterilize and keep them moist
Extracted teeth are treated as potentially infectious until they’re sterilized. The course’s Extracted-Tooth Lab Guide walks you through it.
Mount them like a quadrant
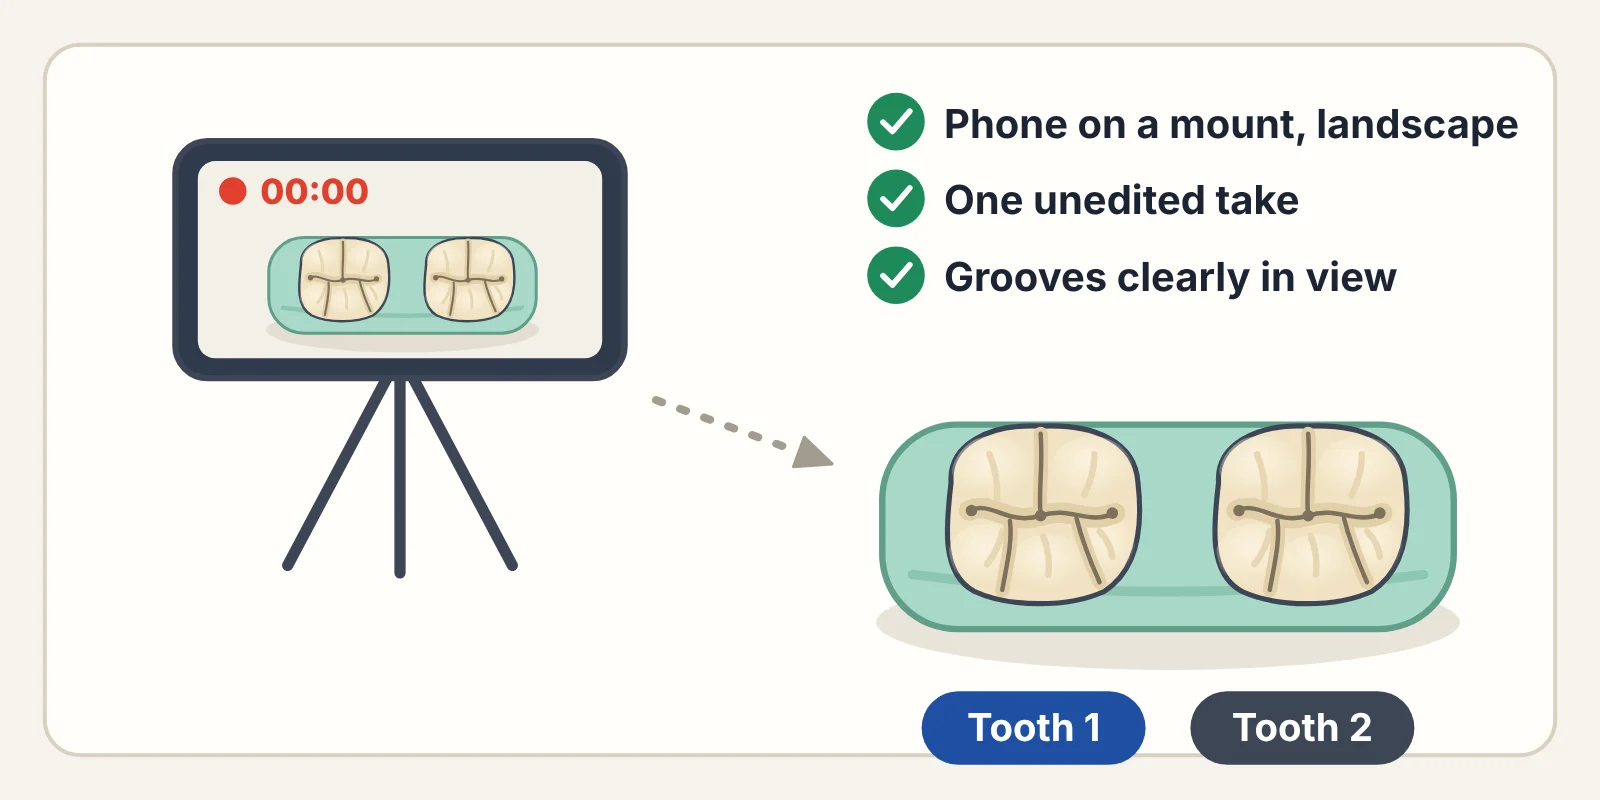
Side by side in putty, stone or bite-registration material, chewing surfaces up. Tooth 1 on the left of the screen, Tooth 2 on the right.
Set up and film
In an operatory, with the tray, material and curing light you’d use on a patient. A phone on a mount, landscape, close enough to see into the grooves.
Upload it
Upload the video and a still photo of each finished sealant in the course app. Dr. Smith reviews every video and gives you a decision within 3 business days.
What the video shows
One take, both teeth, start to finish
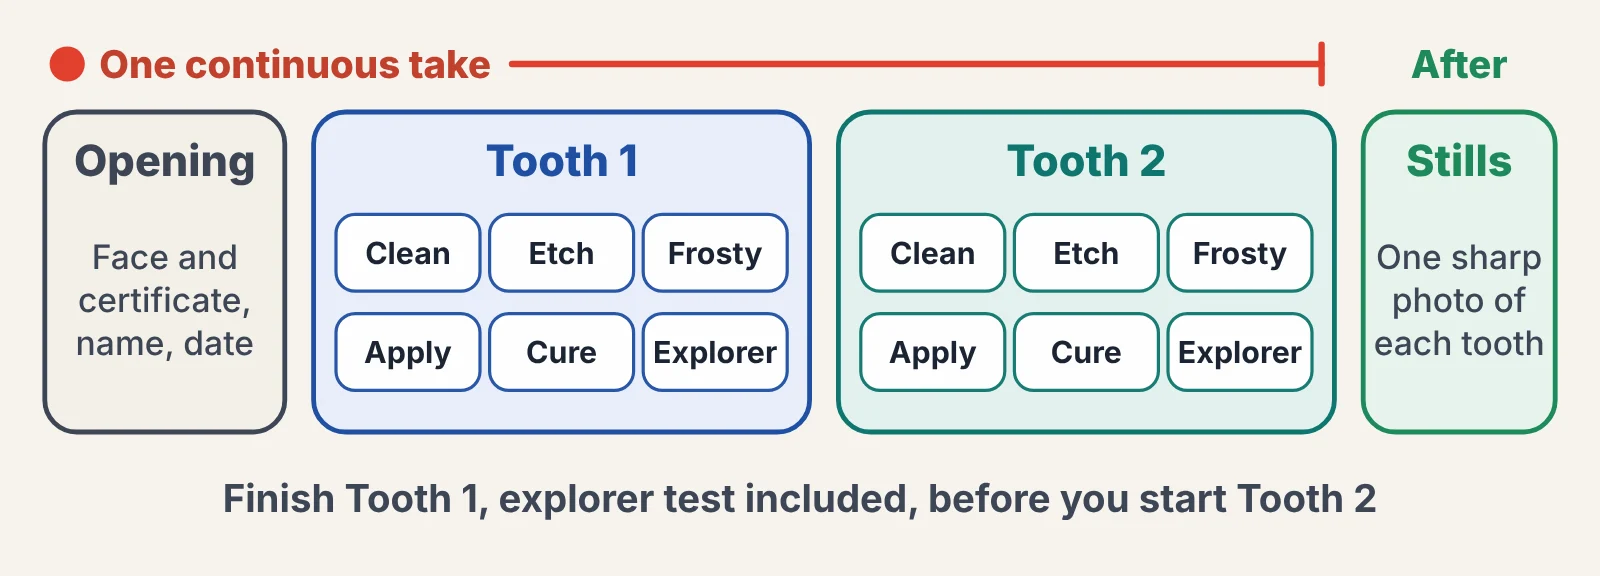
You seal Tooth 1 from cleaning through the explorer test, then Tooth 2 the same way, and say what you’re doing as you go.
- Your face and your Oregon EFDA certificate together at the start, with your name and the date
- One continuous take: no cuts, no joined clips, no speed-up
- The full sequence on both teeth, one tooth at a time
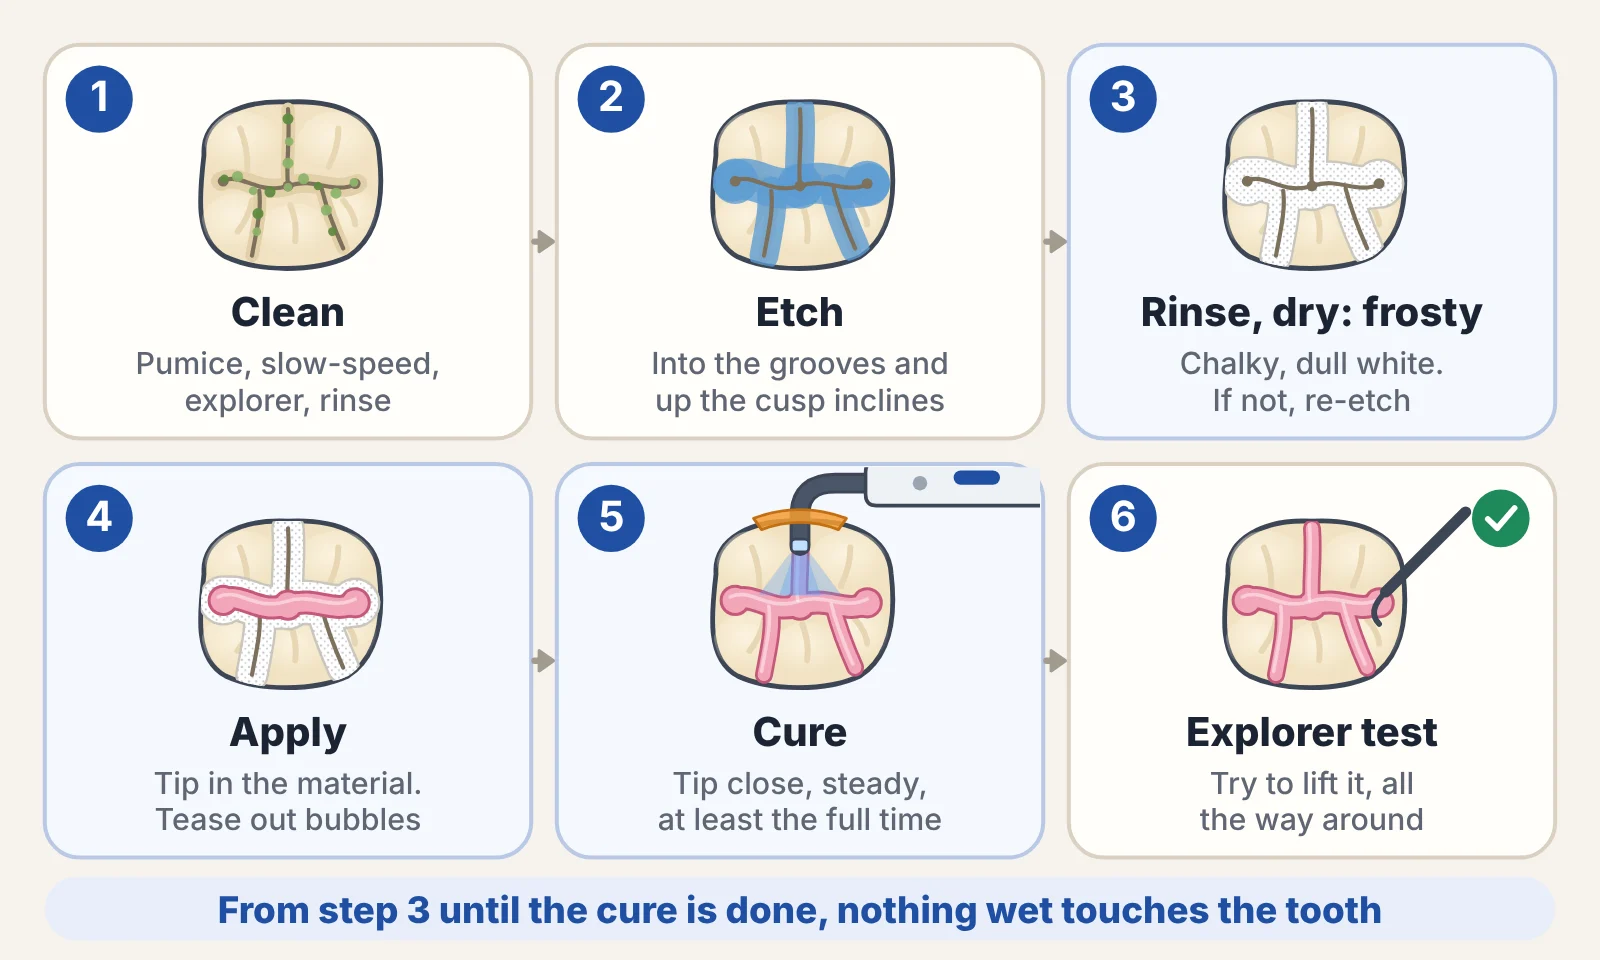
- A close-up of the frosty, etched enamel before any sealant goes on
- A talk-through that names each step and says the etch and cure times out loud
- The explorer test on camera: the tip along the margins, and a real attempt to lift the sealant
- PPE as for a patient, with an orange shield or orange glasses during curing
How it’s scored
The 11 critical items
The course gives you the same checklist Dr. Smith scores against. Miss any one of these and you record a new video.
- One unedited take
- Your face and your EFDA certificate
- Both teeth, one at a time
- PPE as for a patient, including the orange shield or orange glasses during curing
- No amalgam teeth
- Frosty enamel shown before application
- No contamination after etching, or a correct re-etch
- Full coverage of the pits and fissures
- No visible voids or bubbles in the stills
- Every sealant passes the explorer test, on the first try or after a correct on-camera repair
- A cure time of at least the manufacturer’s
After you upload
A decision from Dr. Smith within 3 business days
- Approved
- The clinical module unlocks, and you can schedule your patient with your supervising dentist.
- Not approved
- It comes back with the reason and the timestamp where Dr. Smith saw the problem. You record a new video, start to finish, on new teeth.
- A second time
- You and Dr. Smith do a review together before you record again.
A problem you catch and fix correctly on camera counts as correct.
What you need
Nothing your office doesn’t already have
- Two extracted molars or premolars (four if you can, so you have spares)
- Your office’s own sealant material, etchant and curing light
- A phone on a mount: a tripod with a phone clamp, a gooseneck or an overhead arm
- Gloves, mask, eyewear and an orange shield or orange glasses
- Your Oregon EFDA certificate
- About an hour in an operatory
Questions about the lab
Where do I get extracted teeth?
Ask your dentist to save extracted molars and premolars, or to call an oral surgeon the office refers to. If your office can’t supply teeth, email admissions and the school can arrange a two-tooth kit for pickup at the Hillsboro campus.
Why can’t I use a tooth with amalgam?
A tooth with amalgam can’t be heat-sterilized, so it can’t be used for the lab. Check every tooth before you sterilize it.
Can I edit the video?
No. It has to be one continuous, unedited take. A helper may move the phone mount closer for the close-ups and set it back down.
What if something goes wrong while I’m recording?
Before you etch, stop and start a brand-new recording from the opening. Once you’ve etched, keep going and fix it on camera: a correct re-etch after contamination, or a correct repair of a void or a lifting sealant, counts as correct.
Do the simulations prepare me for this?
Yes. Seal the Tooth walks the whole sequence step by step and ends with a film-ready run, and the course gives you the Lab Video Checklist that Dr. Smith scores against.
Can I seal a patient’s teeth before the video is approved?
No. The clinical module stays locked until Dr. Smith approves your lab video.
Online certificate course for Oregon EFDAs
Ready to add sealants to your chairside skills?
100% online, self-paced coursework. The lab and your patient happen at your own office. No class day, no travel, no time off work. An office can pay with its card at checkout.
- $299 one-time, 6 months of access
- About 7 hours of coursework, at your pace
- 1 supervised patient at your own office
- A Certificate of Completion for your office’s files