Placement of Pit and Fissure Sealants
Sealant course syllabus
Every module, lesson, simulation and check, in the order you take them. The lessons open one after another, so you always know what comes next.
The path
Online first, then your office
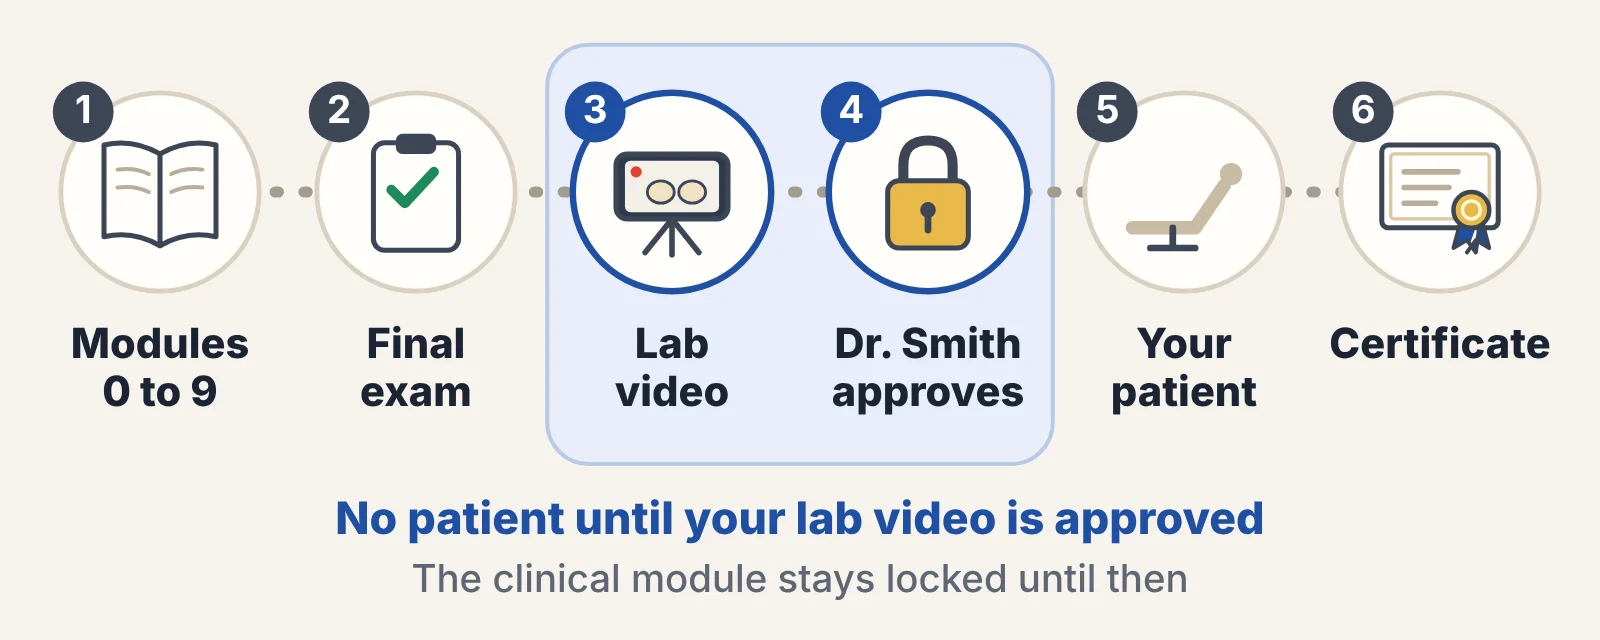
You finish the modules and pass the exam online. Then the lab video and your patient happen at your own office, with your supervising dentist.
- sections, from Module 0 to your patient
- 14
- interactive simulations
- 9
- module knowledge checks
- 9
- exam questions, 80% to pass
- 25
Module by module
What you do in each section
Narrated lessons in Dr. Smith’s voice, short videos, readings with illustrations, simulations and a knowledge check in each module.
- Module 0Online
Start here
Know how the course works and get your supervising dentist’s agreement signed.
- ReadingHow this course works
- VideoWelcome to the course
- ReadingYour course paperwork
- AssignmentUpload your Supervising Dentist Agreement
- Module 1Online
Oregon rules and your role
Know exactly what Oregon allows, including the four conditions and the 45-day rule.
- Narrated lessonOregon rules and your role
- ReadingThe rule, the 45-day prescription and the check
- SimulationAllowed or Not?
- Knowledge checkModule 1 check
- Module 2Online
Health history
Review a health history with sealants in mind, and know what to take to the dentist.
- Narrated lessonHealth history before sealants
- ReadingA health history with sealants in mind
- SimulationChart Review
- Knowledge checkModule 2 check
- Module 3Online
Infection control and OSHA
Protect the patient and yourself, from PPE to chemicals and the curing light.
- Narrated lessonInfection control and OSHA
- ReadingInfection control, chemicals and the curing light
- PracticePPE sequencing
- Knowledge checkModule 3 check
- Module 4Online
Who gets a sealant
Recognize a tooth that should be sealed, and the signs that mean stop and ask the dentist.
- VideoInto the fissure
- ReadingPits, fissures, indications and contraindications
- SimulationSeal or Not?
- Knowledge checkModule 4 check
- Module 5Online
Materials and curing lights
Work with light-cured and self-cured sealants, the etchant and the curing light.
- Narrated lessonSealant materials and curing lights
- ReadingMaterials reference
- SimulationMaterial Match
- Knowledge checkModule 5 check
- Module 6Online
Mirror, fulcrum and slow-speed handpiece
Work in the mirror with a stable fulcrum, and keep the handpiece at a controlled speed.
- VideoThe slow-speed handpiece and rheostat
- ReadingMirror, fulcrum and the slow-speed handpiece
- SimulationMirror Drill
- SimulationRheostat Control
- Knowledge checkModule 6 check
- Module 7Online
Tray setup
Set a sealant tray in order of use.
- ReadingThe sealant tray
- SimulationSet the Tray
- Knowledge checkModule 7 check
- Module 8Online
Technique: keep it dry
Place a sealant with a dry field, from cleaning through the explorer check.
- VideoSealing two molars, start to finish
- ReadingThe sealant sequence, step by step
- SimulationSeal the Tooth
- Knowledge checkModule 8 check
- Module 9Online
Evaluation, terms and trends
Evaluate and chart a sealant, fix the common problems and answer patients’ questions.
- Narrated lessonEvaluating sealants, and where sealants are heading
- SimulationWhat Went Wrong?
- ReadingThe chart note, terminology and trends
- Knowledge checkModule 9 check
- HomeworkOnline
Two assignments at your office
Connect the lessons to the materials and patients in your own office.
- AssignmentYour office’s sealant materials
- AssignmentCase planning
- Review and examOnline
Review and final exam
Pass the written exam before the lab.
- Narrated lessonHigh-yield review
- ExamFinal exam
- LabAt your office
Lab video: two extracted teeth
Seal two extracted teeth in one unedited video that Dr. Smith approves.
- ReadingYour lab: teeth, setup and what Dr. Smith watches for
- VideoHow to film your lab
- AssignmentFilm a 30-second setup check
- AssignmentSend in your lab video
- ClinicalAt your office
Your patient
Place sealants on at least two teeth for one patient, under your supervising dentist.
- ReadingThe clinical phase: sealants on a patient
- AssignmentClinical packet
Built on the Board’s outline
Every topic in the Board’s outline
Covers all 12 lecture topics in the Board’s course outline for pit and fissure sealants. The final exam draws on all of them.
25 questions · 80% to pass · 2 attempts
- The Oregon rule on sealant placement by an EFDA
- Patient health history review
- Infection control
- OSHA: operator injury and spill cleanup
- Equipment and instruments: fulcrum and mouth mirror
- Slow-speed handpiece and the rheostat
- Indications and contraindications
- Technique: maintaining a dry field
- Materials: light-cured and chemically cured
- Tray setup and armamentarium
- Terminology
- Current and future trends
Online certificate course for Oregon EFDAs
Ready to add sealants to your chairside skills?
100% online, self-paced coursework. The lab and your patient happen at your own office. No class day, no travel, no time off work. An office can pay with its card at checkout.
- $299 one-time, 6 months of access
- About 7 hours of coursework, at your pace
- 1 supervised patient at your own office
- A Certificate of Completion for your office’s files